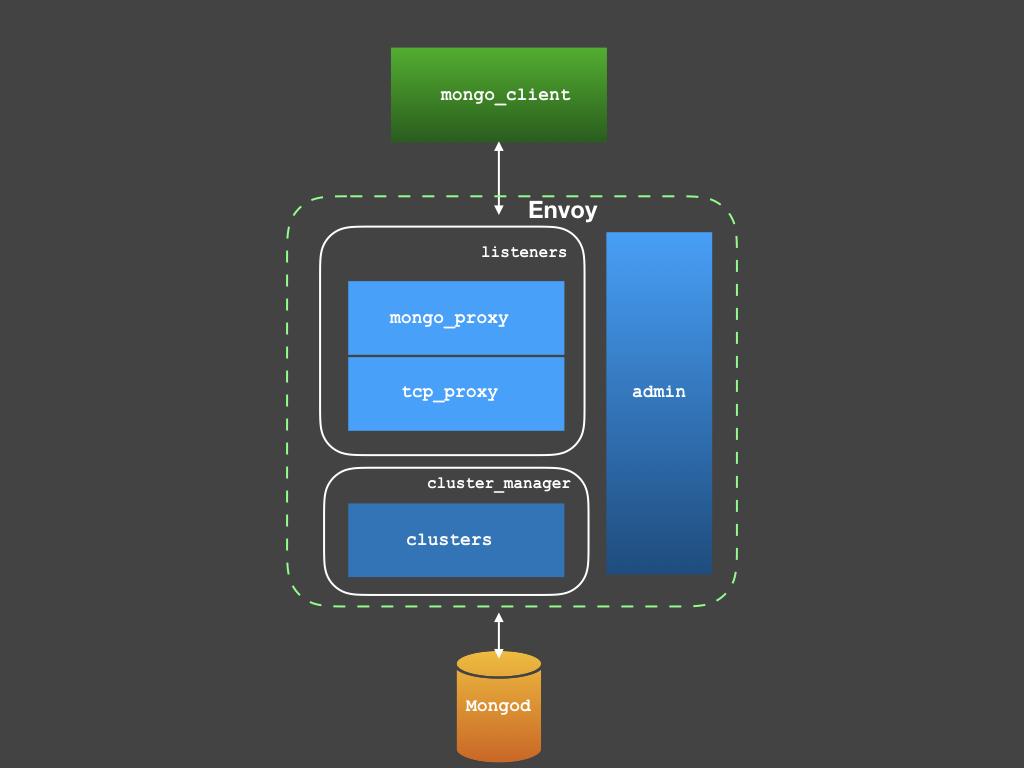
这两天抽空试玩了一下envoy:
编译安装
习惯于编译代码然后debug,而最新的代码依赖实在过于庞大,因此选择了envoy的第一个开源版本
稍微修改了一下自带的ci脚本,将对应的第三方依赖手动下载之后,目前基本上可以做到二键编译(在我的Ubuntu 16.04.3 LTS虚拟机上编译通过)。
配置说明
envoy初期版本的配置是json格式的,现在的版本已经改成了yaml了,尽管是1.0.0版本,envoy配置还是显得非常丰富,主要包括以下几大类:
- listeners:监听器,也就是对外供downstream链接的配置
- admin:管理端口
- cluster_manager:upstream的集群配置,提供诸如服务发现,负载均衡,健康检查等特性
- flags_path:基于文件的配置指令
- statsd_local_udp_port:上报统计数据的statsd服务对应的udp端口
- statsd_tcp_cluster_name:上报统计数据的statsd服务对应的tcp服务集群名
- tracing:调用链数据上报配置
- rate_limit_service:外部依赖的全局限流服务
- runtime:运行时动态配置,可以做到热加载
其中前三类为必选的,其中每类里面又分为各个小类别,看下文这个例子就很清楚了。
一个基于mongodb的代理例子
1 | { |

这里需要注意的是listeners里面可以有多个filters,组成一个类似职责链的模式。
官网文档有一段描述:
Since Envoy is fundamentally written as a L3/L4 server, basic L3/L4 proxy is easily implemented. The TCP proxy filter performs basic 1:1 network connection proxy between downstream clients and upstream clusters. It can be used by itself as an stunnel replacement, or in conjunction with other filters such as the MongoDB filter or the rate limit filter.
envoy对于L3/4层有一个基础的实现,像示例中的mongo_proxy其实只是做了各类统计工作,一般都需要额外配置一个tcp_proxy来做流量转发。